Special offer! Comprehensive professional teeth cleaning for only 1699 UAH.
Special offer! Comprehensive professional teeth cleaning for only 1699 UAH.
Special offer! Comprehensive professional teeth cleaning for only 1699 UAH.
Special offer! Comprehensive professional teeth cleaning for only 1699 UAH.
Special offer! Comprehensive professional teeth cleaning for only 1699 UAH.
Special offer! Comprehensive professional teeth cleaning for only 1699 UAH.
Special offer! Comprehensive professional teeth cleaning for only 1699 UAH.
Special offer! Comprehensive professional teeth cleaning for only 1699 UAH.
Special offer! Comprehensive professional teeth cleaning for only 1699 UAH.
Special offer! Comprehensive professional teeth cleaning for only 1699 UAH.
Sign up
 (044) 394 90 94
(044) 394 90 94  Holosiivska/Demiivska metro station
Sign up
(044) 394 90 94
(044) 394 90 94
Doctors


 Prices
Blog
Contacts
Prices
Blog
Contacts
пр.Лобановського, 130, Київ, Україна
Temporarily closed
Opening soon
78A, Irpinska St., Kyiv, Ukraine
Temporarily closed
Opening soon
32A, Heroiv Dnipra St., Kyiv, Ukraine
Temporarily closed
Opening soon
9B, Yevhena Chykalenko St. (Pushkinska), Kyiv, Ukraine
Temporarily closed
Opening soon
(044) 394 90 94
Back
Dentistry
General Dentistry
Dental surgery
Dental Implants
Maxillofacial Surgery
Dental prosthetics
Cosmetic dentistry
Professional Dental Hygiene

Periodontics
Orthodontic dentistry
Gnathology & TMJ Therapy

Pediatric Dentistry
Dental X-Rays
Back
Orthodontic Center
Orthodontic dentistry
Gnathology & TMJ Therapy
Back
Prosthodontic Center
Dental prosthetics
Back
MED-DEO Center for Maxillofacial Surgery & Facial Plastics
Maxillofacial Surgery
Plastic surgery
Back
Surgical Dental Center
Dental surgery
Dental Implants
Search on the site


Popular requests
Teeth whitening
Treatment of caries
Wisdom tooth extraction
Bracket system
Dental veneers
Tooth restoration
Pediatric dentist
Consultation with a dentist-therapist
Search results by: «».
Unfortunately, no results were found for your search: “Pediatric Endocrinologist”, nothing was found.
You may find these links useful:
Clinics "MED-DEO"
пр.Лобановського, 130, Київ, Україна
Temporarily closed
Opening soon
78A, Irpinska St., Kyiv, Ukraine
Temporarily closed
Opening soon
32A, Heroiv Dnipra St., Kyiv, Ukraine
Temporarily closed
Opening soon
9B, Yevhena Chykalenko St. (Pushkinska), Kyiv, Ukraine
Temporarily closed
Opening soon
Services
Dentistry Orthodontic Center Prosthodontic Center MED-DEO Center for Maxillofacial Surgery & Facial Plastics Surgical Dental CenterGeneral Dentistry
Dental surgery
Dental Implants
Maxillofacial Surgery
Dental prosthetics
Cosmetic dentistry
Professional Dental Hygiene
Periodontics
Orthodontic dentistry
Gnathology & TMJ Therapy
Pediatric Dentistry
Dental X-Rays
Orthodontic dentistry
Gnathology & TMJ Therapy
Dental prosthetics
Maxillofacial Surgery
Dental surgery
Dental Implants
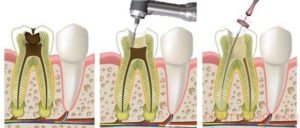

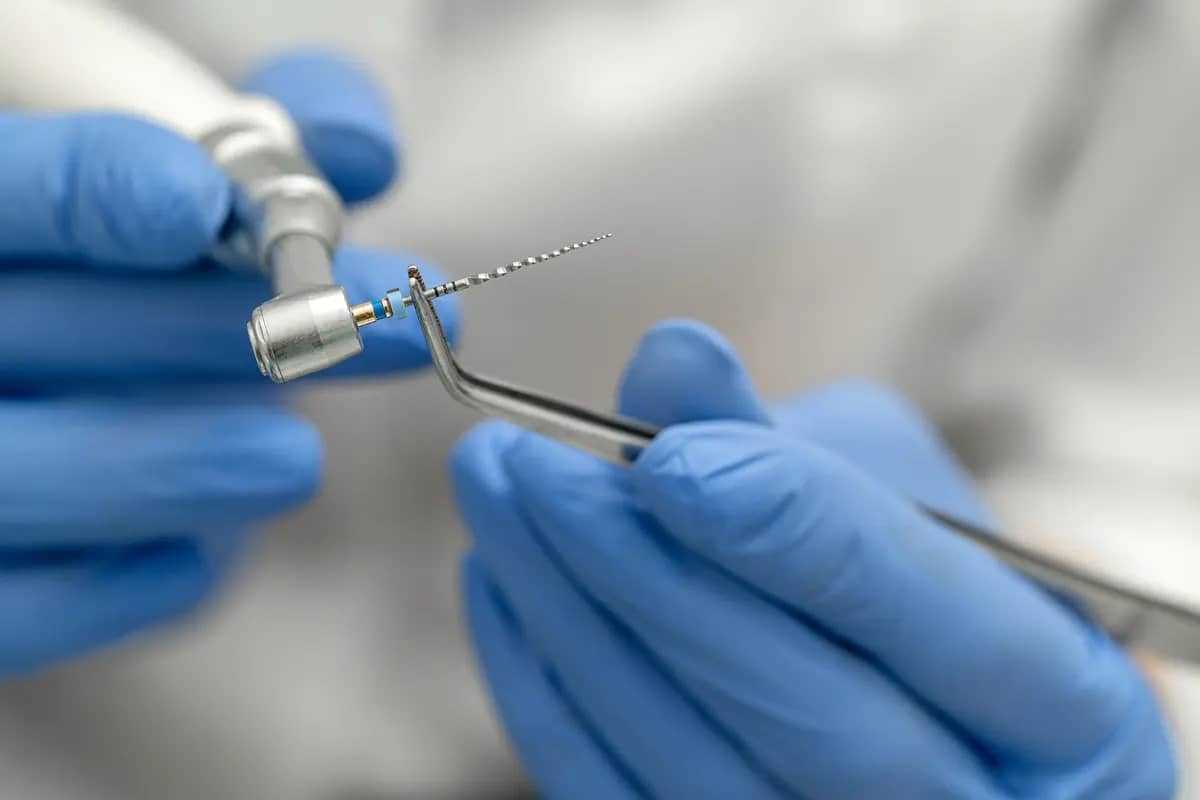
Endodontic instruments are the tools a dentist uses to work inside root canals. They are used to locate, clean, and prepare canals for filling. The quality of treatment and its outcome largely depend on which instruments are used and how.
What Are Endodontic Instruments and What Are They Used For
Endodontic instruments are a specialized set of tools that a dentist uses to work inside root canals. They allow access to the internal part of the tooth and enable a complete treatment cycle — from locating the canals to sealing them hermetically. Without these instruments, proper canal treatment is simply not possible.
Each stage of endodontic treatment has its own instruments and its own purpose:
Diagnosis and canal location Fine instruments are used to find canal entrances, assess their patency, and understand the basic anatomy.
Initial negotiation A highly delicate stage during which the dentist carefully navigates the canal along its entire length, identifying curves, narrowings, and possible branching.
Canal shaping Once negotiated, the canal is gradually widened and given the correct shape — essential for thorough cleaning and future obturation.
Cleaning (disinfection) Instruments remove affected tissue, pulp remnants, and infection from the canal walls. This is one of the key stages that directly determines the treatment outcome.
Preparation for obturation After instrumentation, the canal is prepared for hermetic filling to eliminate any voids or space for bacteria.
In summary, endodontic instruments are not a single device but an entire system of tools, each performing its role at a specific stage of treatment — together ensuring complete root canal preparation.ль на определенном этапе лечения и вместе они обеспечивают полную обработку корневых каналов.



Main Types of Endodontic Instruments
Endodontic instruments in dentistry are classified according to what they do during canal treatment. This helps to understand the overall process — from locating the canal to obturating it.
There are several main groups:
- diagnostic — to locate canals and assess their patency;
- negotiation — to carefully navigate the canal to its full length;
- shaping — to give the canal its correct form;
- cleaning — to remove tissue remnants and bacteria;
- obturation — to densely fill the canal with material.
At any given stage, the dentist typically uses several different instruments rather than just one.
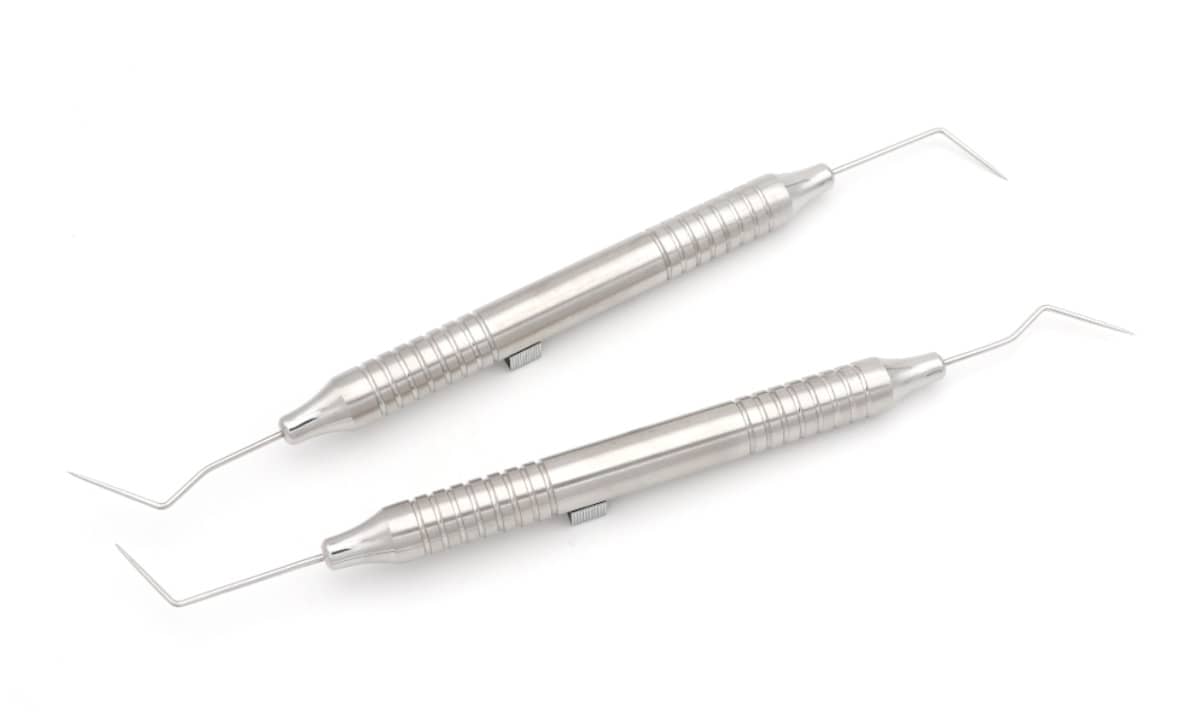
Manual Endodontic Instruments
These are root canal instruments that the dentist operates by hand. They provide maximum tactile control and are especially important in the early stages of treatment.
Manual endodontic instruments are used when it is necessary to:
- carefully locate and initially negotiate a canal;
- create a glide path for further instrumentation;
- work with complex or curved canals.
In such situations, manual instruments are often indispensable — they allow the dentist to feel the canal and avoid critical errors.
Rotary Endodontic Instruments
Rotary endodontic instruments are tools that operate via a specialized handpiece — they rotate or move automatically.
Their advantages include:
- faster working speed;
- more uniform and predictable canal shaping;
- reduced physical strain on the dentist.
There are two main types:
- rotary endodontic instruments — rotate continuously;
- reciprocating endodontic instruments — move in a back-and-forth motion, reducing the risk of instrument separation.
Most modern endodontic instruments are made from nickel-titanium — a flexible material that adapts well to the canal shape, even in severely curved cases.
Endodontic Files: Types and Differences
Endodontic files are the primary instruments used to work inside canals. They are used to negotiate, clean, and shape the canal. While they may look similar on the surface, they differ in design, flexibility, and technique of use.
The most commonly used endodontic instruments are K-files, H-files, and reamers. Each serves a specific purpose — modern endodontic practice is simply not possible without them.
K-files, H-files, and Reamers
K-files The most versatile option. Used at the beginning of treatment to carefully locate and negotiate the canal. They can be used in a push-pull motion or with a light rotational action, offering excellent tactile control.
H-files More aggressive in action. They effectively debride the canal walls and remove tissue remnants. Their primary motion is pull-back, and they require careful handling.
Reamers Better suited for canal enlargement. They work with a rotational motion and help shape the canal more efficiently, though they are less commonly used for cleaning.
Simply put: K-file — for initial negotiation and control; H-file — for active cleaning; reamer — for enlargement.
Instruments for Root Canal Obturation
Once the canal has been cleaned and prepared, it must be densely filled. Dedicated endodontic instruments are used for this purpose.
Lentulo spiral Used to evenly distribute the filling material inside the canal.
Spreader Creates space within the canal to allow the material to be packed more densely.
Plugger Compacts the filling material to eliminate voids inside the canal.
The key goal here is hermetic sealing. If the canal is not filled completely, residual voids may allow bacteria to recolonize — increasing the risk of reinfection.
ISO Standards and Endodontic Instrument Marking
To ensure consistency across instruments, dentistry uses a standardized marking system — ISO. It allows the dentist to immediately understand what an instrument is and what it is designed for.
The main designations are as follows:
Number (size) Indicates the diameter of the instrument at its tip. For example, size #10 corresponds to approximately 0.10 mm. The higher the number, the wider the instrument.
Color Each size has a corresponding color code. This allows the dentist to identify instruments at a glance without reading the numbers each time.
Length Instruments are available in different lengths to accommodate different teeth and canal depths.
Taper Indicates how much the instrument widens from the tip toward the handle.
These parameters act as the instrument’s “specification sheet,” enabling precise selection for any given clinical situation.
What Taper Means in Endodontic Instruments
The taper of an endodontic instrument describes how rapidly the instrument increases in diameter from tip to shank.
For example:
- taper 0.02 — the instrument widens gradually;
- 0.04 or 0.06 — widens more rapidly, opening the canal more aggressively.
Why this matters:
- the canal is shaped with a smooth, controlled taper;
- cleaning and obturation become more effective;
- the risk of perforation or strip perforation is reduced.
In simple terms: taper determines how aggressively the instrument shapes the canal and how predictably that shaping occurs.
Root Canal Instrumentation: A Step-by-Step Overview
Root canal treatment is not a single procedure — it is a precise sequence of steps. Each stage serves a specific purpose and directly influences the final outcome: how thoroughly the canal is cleaned and sealed.
1. Access preparation The dentist opens the coronal portion of the tooth to gain direct access to the pulp chamber. Proper access is critical to locate all canals and miss none.
2. Initial canal negotiation The dentist uses very fine instruments to carefully navigate the canal along its full length — assessing the anatomy, identifying curves, narrowings, and bifurcations, and establishing the working length.
3. Canal shaping Once negotiated, the canal is progressively widened and given a tapered shape. This is essential not only for cleaning but also for achieving a quality, dense obturation.
4. Irrigation Throughout instrumentation, the canal is continuously flushed with antiseptic solutions. Instruments alone cannot remove everything — irrigation washes away pulp remnants, bacteria, and debris from areas the instrument cannot physically reach.
5. Canal drying Before obturation, the canal is thoroughly dried. Residual moisture can compromise the seal and adhesion of the filling material to the canal walls.
6. Obturation The final step — hermetic sealing of the canal with a specialized filling material. The goal is to completely isolate the internal tooth structure from bacteria and prevent reinfection.
To summarize: root canal instrumentation is a sequential system in which each stage prepares the canal for the next. The quality of every step directly determines how durable and successful the treatment will be.
Manual vs. Rotary Endodontic Instruments: Which to Choose
Manual and rotary instruments are not “better” or “worse” than one another — they simply serve different purposes in canal treatment.
Manual instruments provide superior tactile feedback. The dentist literally feels the canal, which makes them preferable at the outset: for locating the orifice, carefully negotiating the canal, and understanding its geometry. This is especially important in narrow or severely curved canals.
Rotary instruments work faster and more consistently. They are typically introduced once the canal has been negotiated and needs to be shaped efficiently and predictably.
To put it simply:
- manual endodontic instrument — more precision and control;
- rotary instruments for root canal preparation — more speed and consistency.
In the vast majority of cases, the dentist combines both approaches rather than relying exclusively on one.
FAQ
Which endodontic instruments are used most frequently?
Endodontic files are by far the most commonly used — they are the primary tools for negotiating and shaping root canals.
What is the difference between manual and rotary instruments?
Manual instruments are operated by hand, giving the dentist direct tactile feedback. Rotary instruments are driven by a handpiece and allow faster, more uniform canal preparation.
What are endodontic files?
Endodontic files are the core instruments for working inside a root canal. They are used to negotiate, clean, and prepare the canal for obturation. уверенность в сложных клинических случаях, безопасность, простоту применения и превосходные результаты.
This article was written by endodontist at Med-Deo Clinic Elena Tomashevska






Make an appointment
You can make an appointment by filling out the application form on the website, as well as using instant messengers:
Make an appointment
You can make an appointment by filling out the application form on the website, as well as using instant messengers:


Make an appointment easily using chatbots:
Also, call the numbers:
Modern dentistry and medical centre "MED-DEO"
Choose a clinic whose location is more convenient for you.
Kyiv, Holosiivska/Demiivska metro station
130 Lobanovskoho Avenue


Working hours:
Mon - Sun: 8:00 AM - 9:00 PM
No days off!
Call the numbers:
How to get to us? Create a route
Create a route
Kyiv, Akademistechko metro station
78A, Irpinska str.


Working hours:
Mon-Sun: 8.00-21.00
Without days off!
Call the numbers:
How to get to us?
Create a route
Create a route
Kyiv, Heroiv Dnipra metro station
32A, Heroiv Dnipra str.

Working hours:
Mon-Sun: 8.00-21.00
Without days off!
Call the numbers:
How to get to us?
Create a route
Create a route
Kyiv, Teatralna metro station
9B, E. Chykalenko (Pushkinska) str.



Working hours:
Mon-Sat: 8.00 - 21.00. Sun: by appointment.
Without days off!
Call the numbers:
How to get to us?
Create a route
Create a route
Відгук від клієнта
0:00
0:00

Your email will not be published on the site.